From download to wheels-up
Everything you need to set up Tropiq and plan your first flight — in about ten minutes.
Download & Create Your Account
Grab Tropiq from the App Store or Google Play, then create your pilot account in under a minute.
Install the app
- 1Open the App Store (iOS) or Google Play (Android) and search for "Tropiq".
- 2Tap Install — the app is free to download.
- 3Once installed, tap the Tropiq icon to launch it. You'll see a short animated splash screen.
Create your account
- 1Tap Create Account on the login screen.
- 2Enter your name, email address, and choose a password.
- 3Alternatively, tap Sign in with Google or Sign in with Apple for one-tap setup.
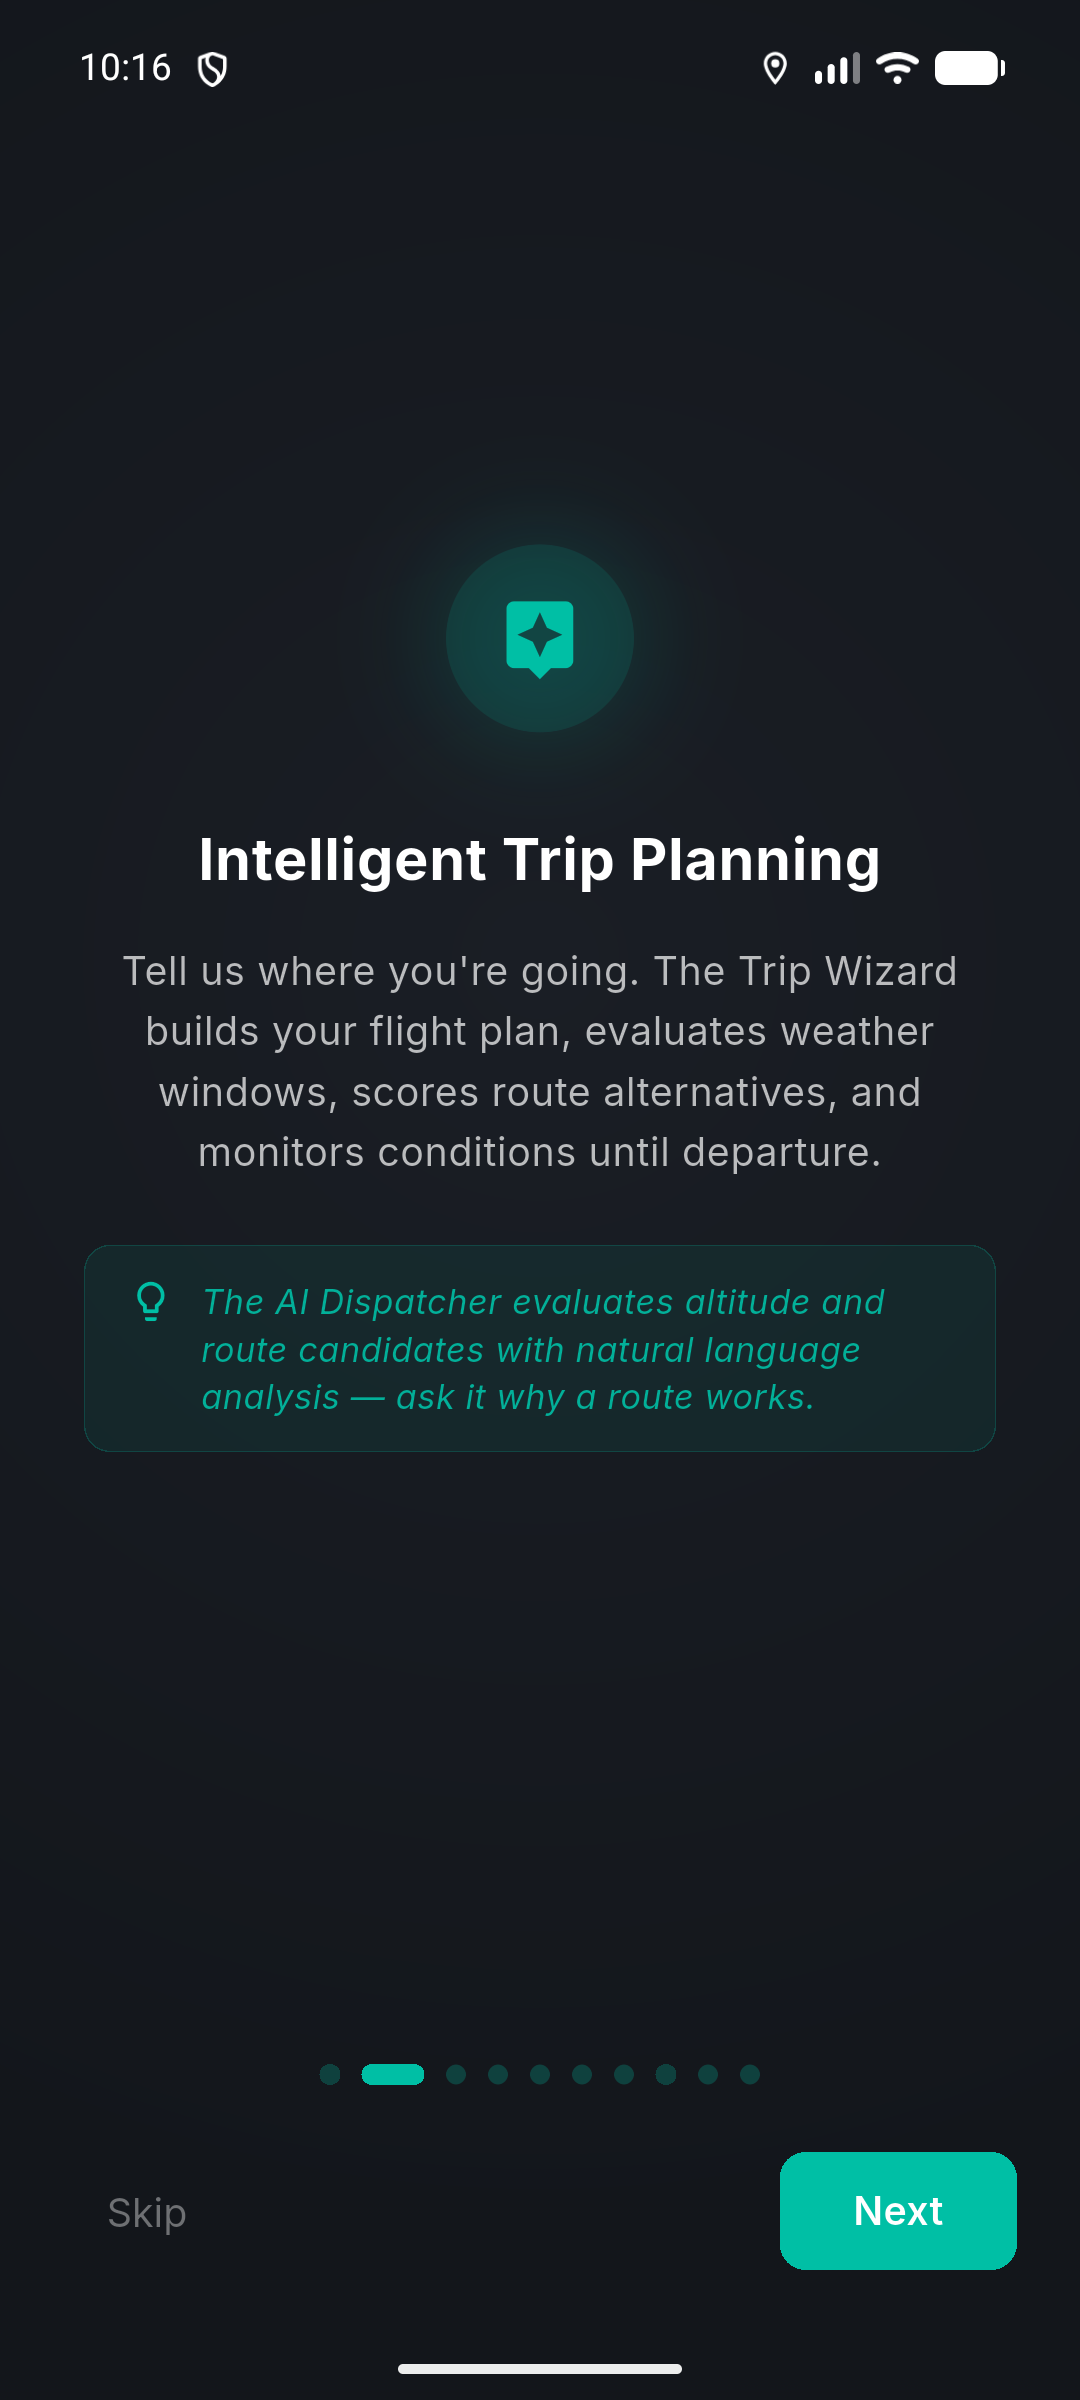
- 4Once signed in, you'll see the first-time tutorial walkthrough — swipe through to see what Tropiq can do, or tap Skip to jump straight in.
Pro tip: Use the same email you use for aviation services. It makes ForeFlight import and Leidos filing smoother later.
Set up your pilot profile
- 1Tap the More tab (bottom-right) and then your name at the top to open your pilot profile.
- 2Enter your home base airport (e.g., KAUS) — this becomes your default departure point.
- 3Add your pilot certificate number and certificate type.
- 4If you're a CFI, add your CFI certificate number and expiration date.
- 5Optionally add your Leidos username if you file flight plans through T.O.D.D.
Pro tip: Your profile info auto-saves as you type. No save button needed.
Import from ForeFlight
Already have aircraft and logbook data in ForeFlight? Bring it all over in a few taps — no CSV exports needed.
Start the import
- 1Open the Aircraft tab and tap the download icon in the top toolbar.
- 2This launches the ForeFlight Import Concierge — a guided wizard that walks you through every step.
- 3Enter your ForeFlight email and password. Tropiq uses these credentials once to pull your data and does not store them.
ForeFlight Import — credentials step
Screenshot: Import concierge screen with email/password fields
Preview and select your data
- 1Tropiq connects to ForeFlight and shows a preview of all aircraft and logbook entries it found.
- 2Each aircraft shows its tail number and type. Aircraft that already exist in Tropiq are flagged so you don't create duplicates.
- 3Toggle on the aircraft you want to import. Toggle on logbook entries as well if you want to bring your flight history.
- 4Tap Import to begin. A progress indicator shows the transfer status.
Pro tip: You can import aircraft only, logbook only, or both at the same time. If you just want the aircraft to start flight planning, skip the logbook for now.
ForeFlight Import — aircraft selection
Screenshot: Aircraft preview list with toggle switches and import button
Review your results
- 1Once the import completes, you'll see a summary: how many aircraft and how many logbook entries were imported.
- 2Head to the Aircraft tab to see your fleet — all tail numbers, types, and configurations are ready to go.
- 3Check the Logbook tab to confirm your entries transferred correctly.
Import results summary
Screenshot: Import complete screen showing counts of imported aircraft and entries
Don't use ForeFlight? No problem — skip ahead to Step 3 to set up your aircraft manually. You can also import logbook data from other sources via the Logbook tab.
Set Up Your Aircraft
Add your airplane (or helicopter) with tail number lookup, performance profiles, and weight & balance — so every flight plan is accurate from the start.
Add a new aircraft
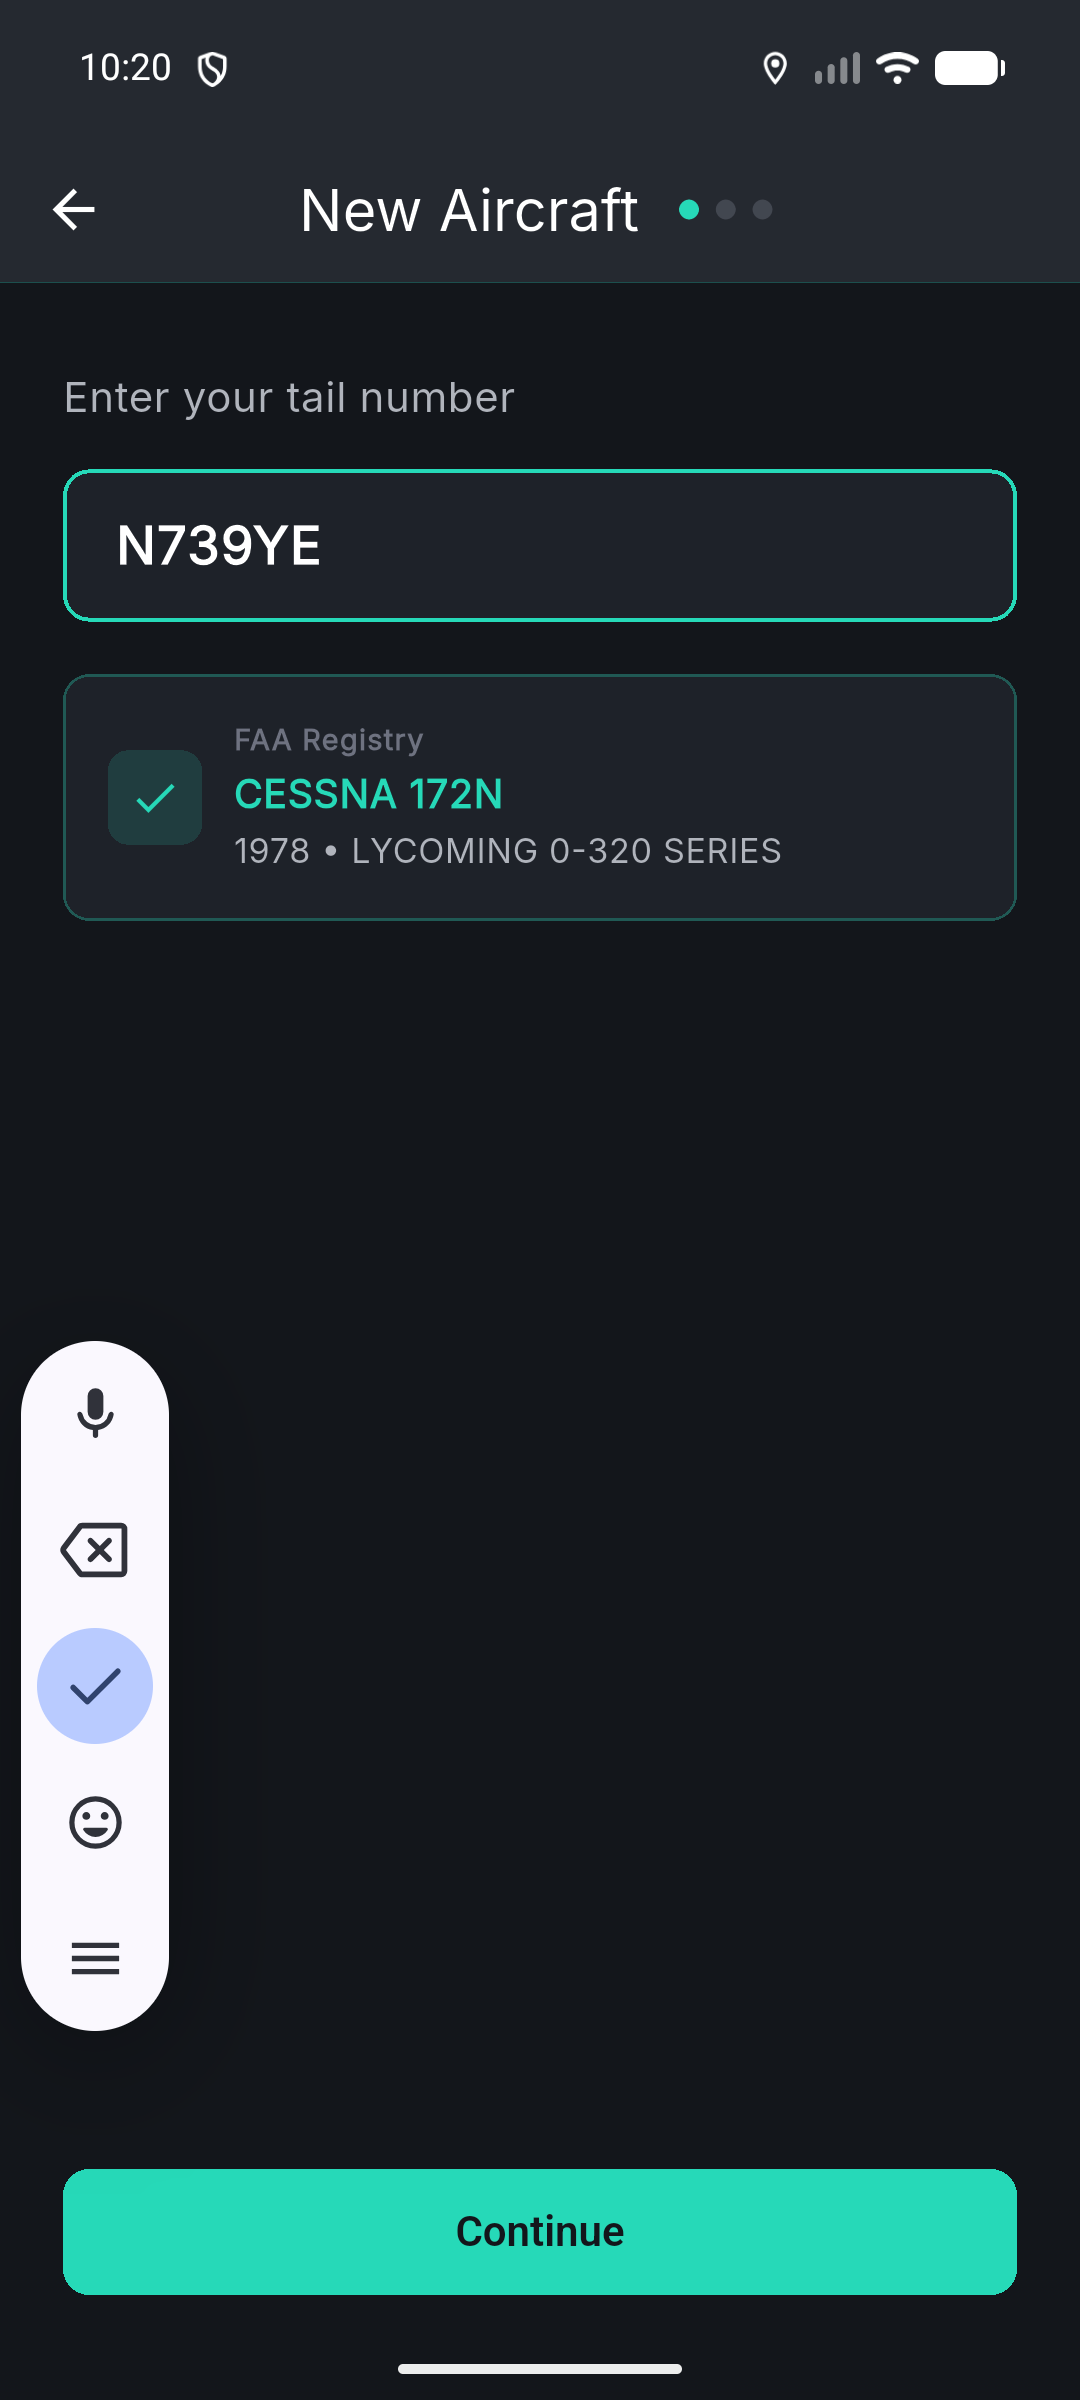
- 1Open the Aircraft tab and tap the + button.
- 2Type your tail number (N-number). Tropiq searches the FAA registry in real time and auto-fills your aircraft type, engine configuration, and registration details.
- 3Confirm the details look correct and tap Next.
Pro tip: The FAA lookup works for all US-registered aircraft. For international registrations, you can enter details manually.

Configure aircraft details
- 1Select your aircraft category (landplane, seaplane, helicopter, etc.).
- 2Choose the fuel type (100LL, Jet-A, etc.).
- 3Pick a master performance profile if one is available for your aircraft type — this pre-loads cruise speeds, fuel burn rates, and climb data.
- 4Tap Next to proceed to weight & balance.
Set up weight & balance
- 1Enter your empty weight and empty weight arm (from your POH or last weigh-in).
- 2Enter max takeoff weight and max landing weight.
- 3If you selected a master profile, you can auto-import the W&B envelope — saving time on station setup.
- 4Tap Create Aircraft when everything looks good.
Pro tip: You can add fuel tanks, equipment, and detailed station arms later from the aircraft detail screen. The basics are all you need to start planning.
Aircraft — weight & balance setup
Screenshot: Aircraft create screen step 3 with weight fields and envelope import option
Explore your aircraft profile
- 1Tap into your newly created aircraft to see the full detail screen.
- 2From here you can configure performance profiles for TOLD (takeoff & landing data), fuel tanks, equipment, filing codes, maintenance tracking, and attached documents.
- 3Set an aircraft as your default by opening its settings — this aircraft will auto-populate when you create new flights.
Aircraft detail screen
Screenshot: Aircraft detail with tabs for profiles, fuel, equipment, maintenance, documents
Configure Your Logbook
Tropiq's digital logbook tracks your flights, currency, endorsements, and certificates — all in one place.
Tour the logbook dashboard
- 1Open the Logbook tab (you may need to find it under More if it's not in your bottom bar).
- 2At the top you'll see your total hours and flight count summary.
- 3Below that is the Currency Dashboard — it tracks Day VFR Passenger, Night VFR Passenger, IFR Currency, Flight Review (61.56), and Medical Certificate status.
- 4Toggle which currency items are visible based on what's relevant to your flying.

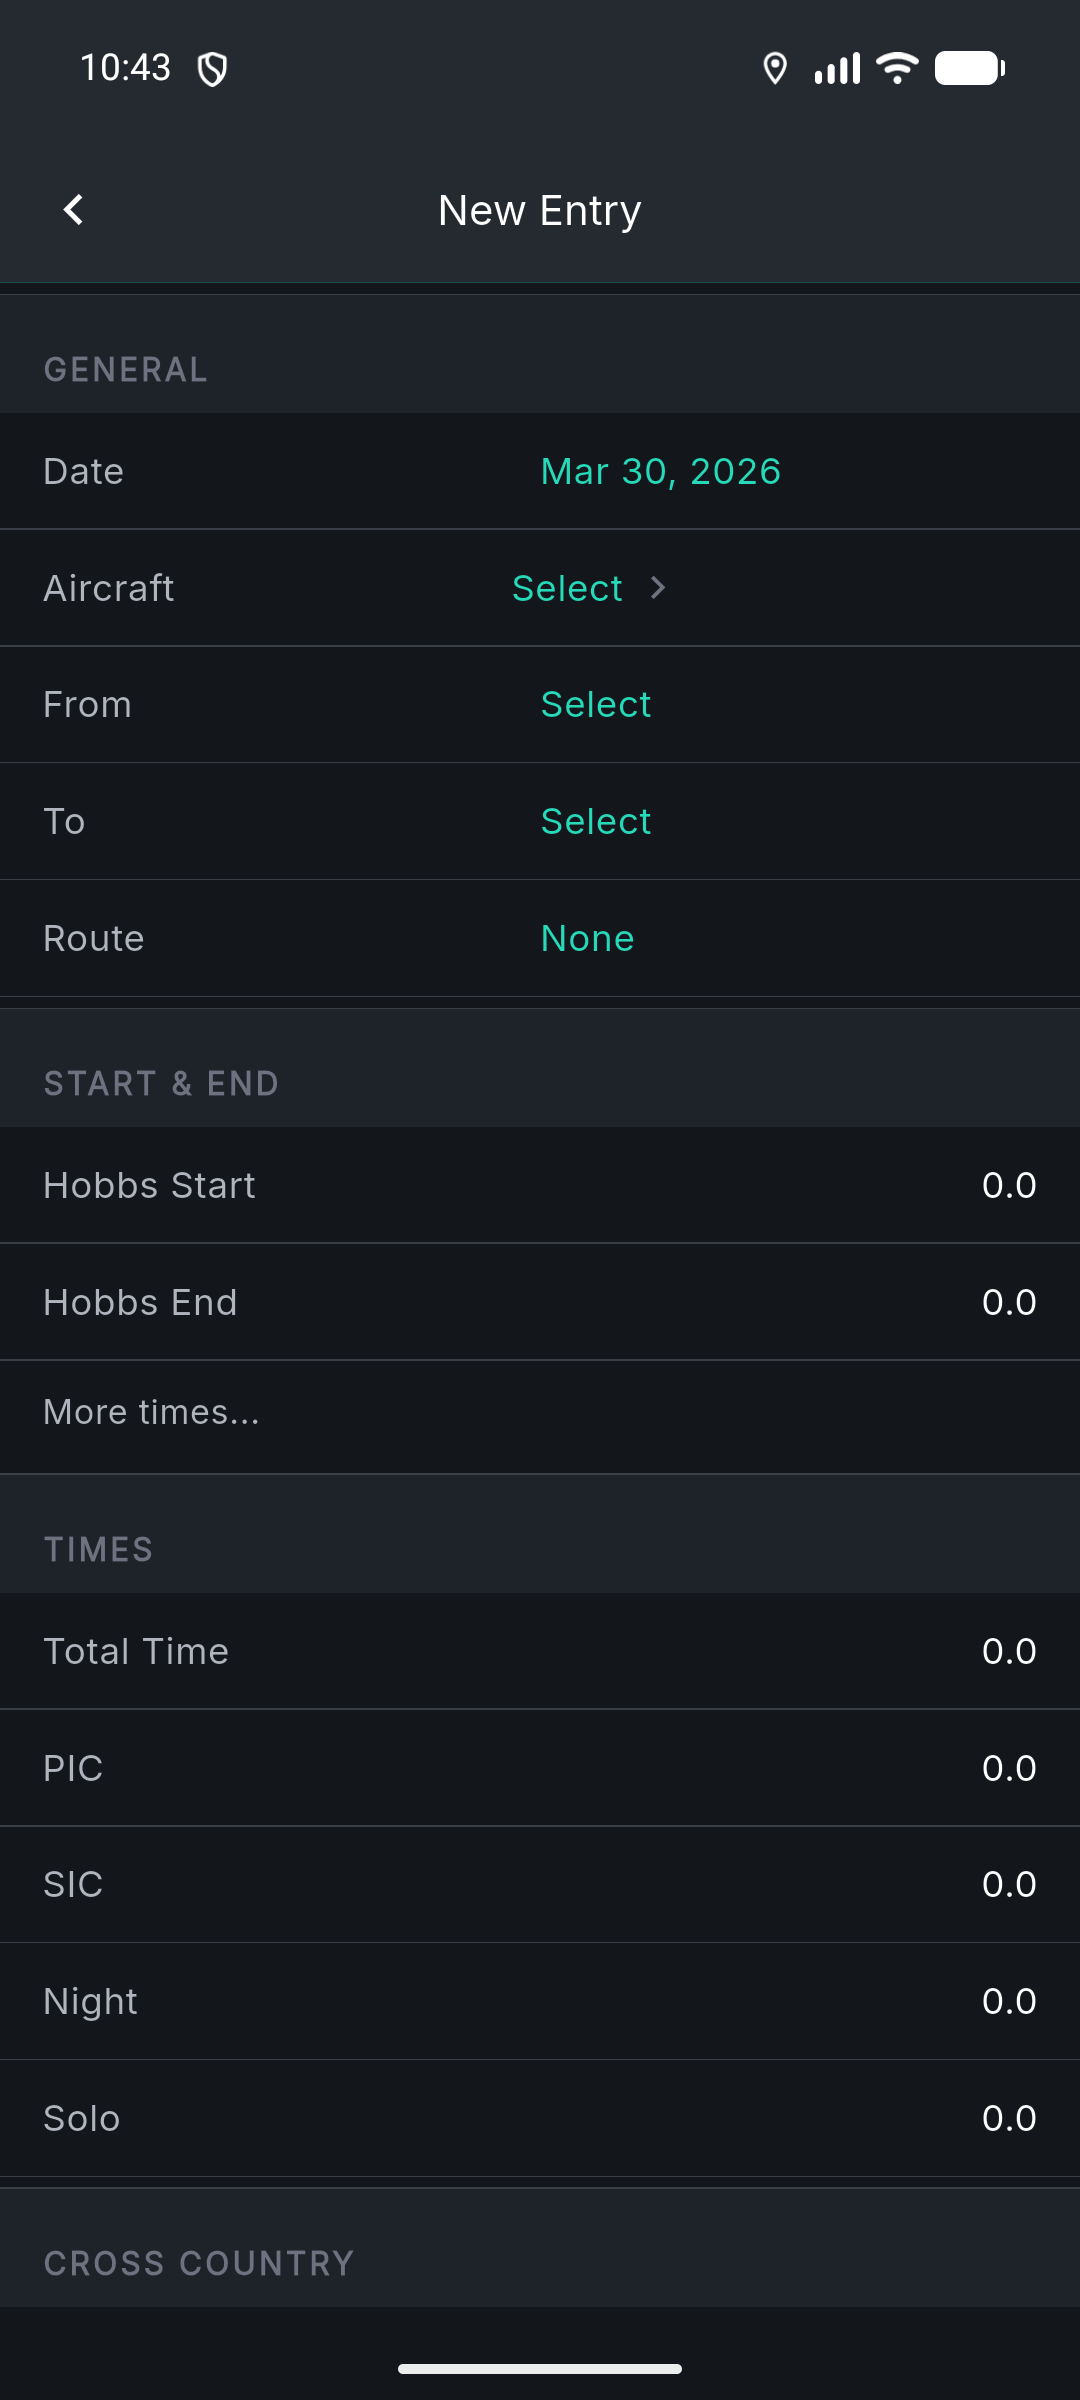
Add a logbook entry
- 1Tap the + button to create a new entry.
- 2Select your aircraft, then enter departure and arrival airports.
- 3Fill in your flight times — total time, PIC, cross-country, actual/simulated instrument, etc.
- 4Add approaches, landings (day/night), and any remarks.
- 5Tap Save. The entry is synced to the cloud and your currency dashboard updates automatically.
Pro tip: After a flight, you can also create a logbook entry directly from a completed flight plan — the route, times, and aircraft pre-fill automatically.
Endorsements & certificates
- 1From the Logbook tab, access your Endorsements and Certificates sections.
- 2Add endorsements you've received from CFIs — they can digitally sign entries right in the app.
- 3Store your pilot certificate details for quick reference.
- 4Generate Insurance, Tax, or Experience reports anytime from the Reports section.
Endorsements & certificates
Screenshot: Endorsements list or certificate detail screen
Plan Your First Flight
This is where Tropiq shines. Create a flight plan with route, weather, fuel, weight & balance, and performance data — all in one fluid workflow.
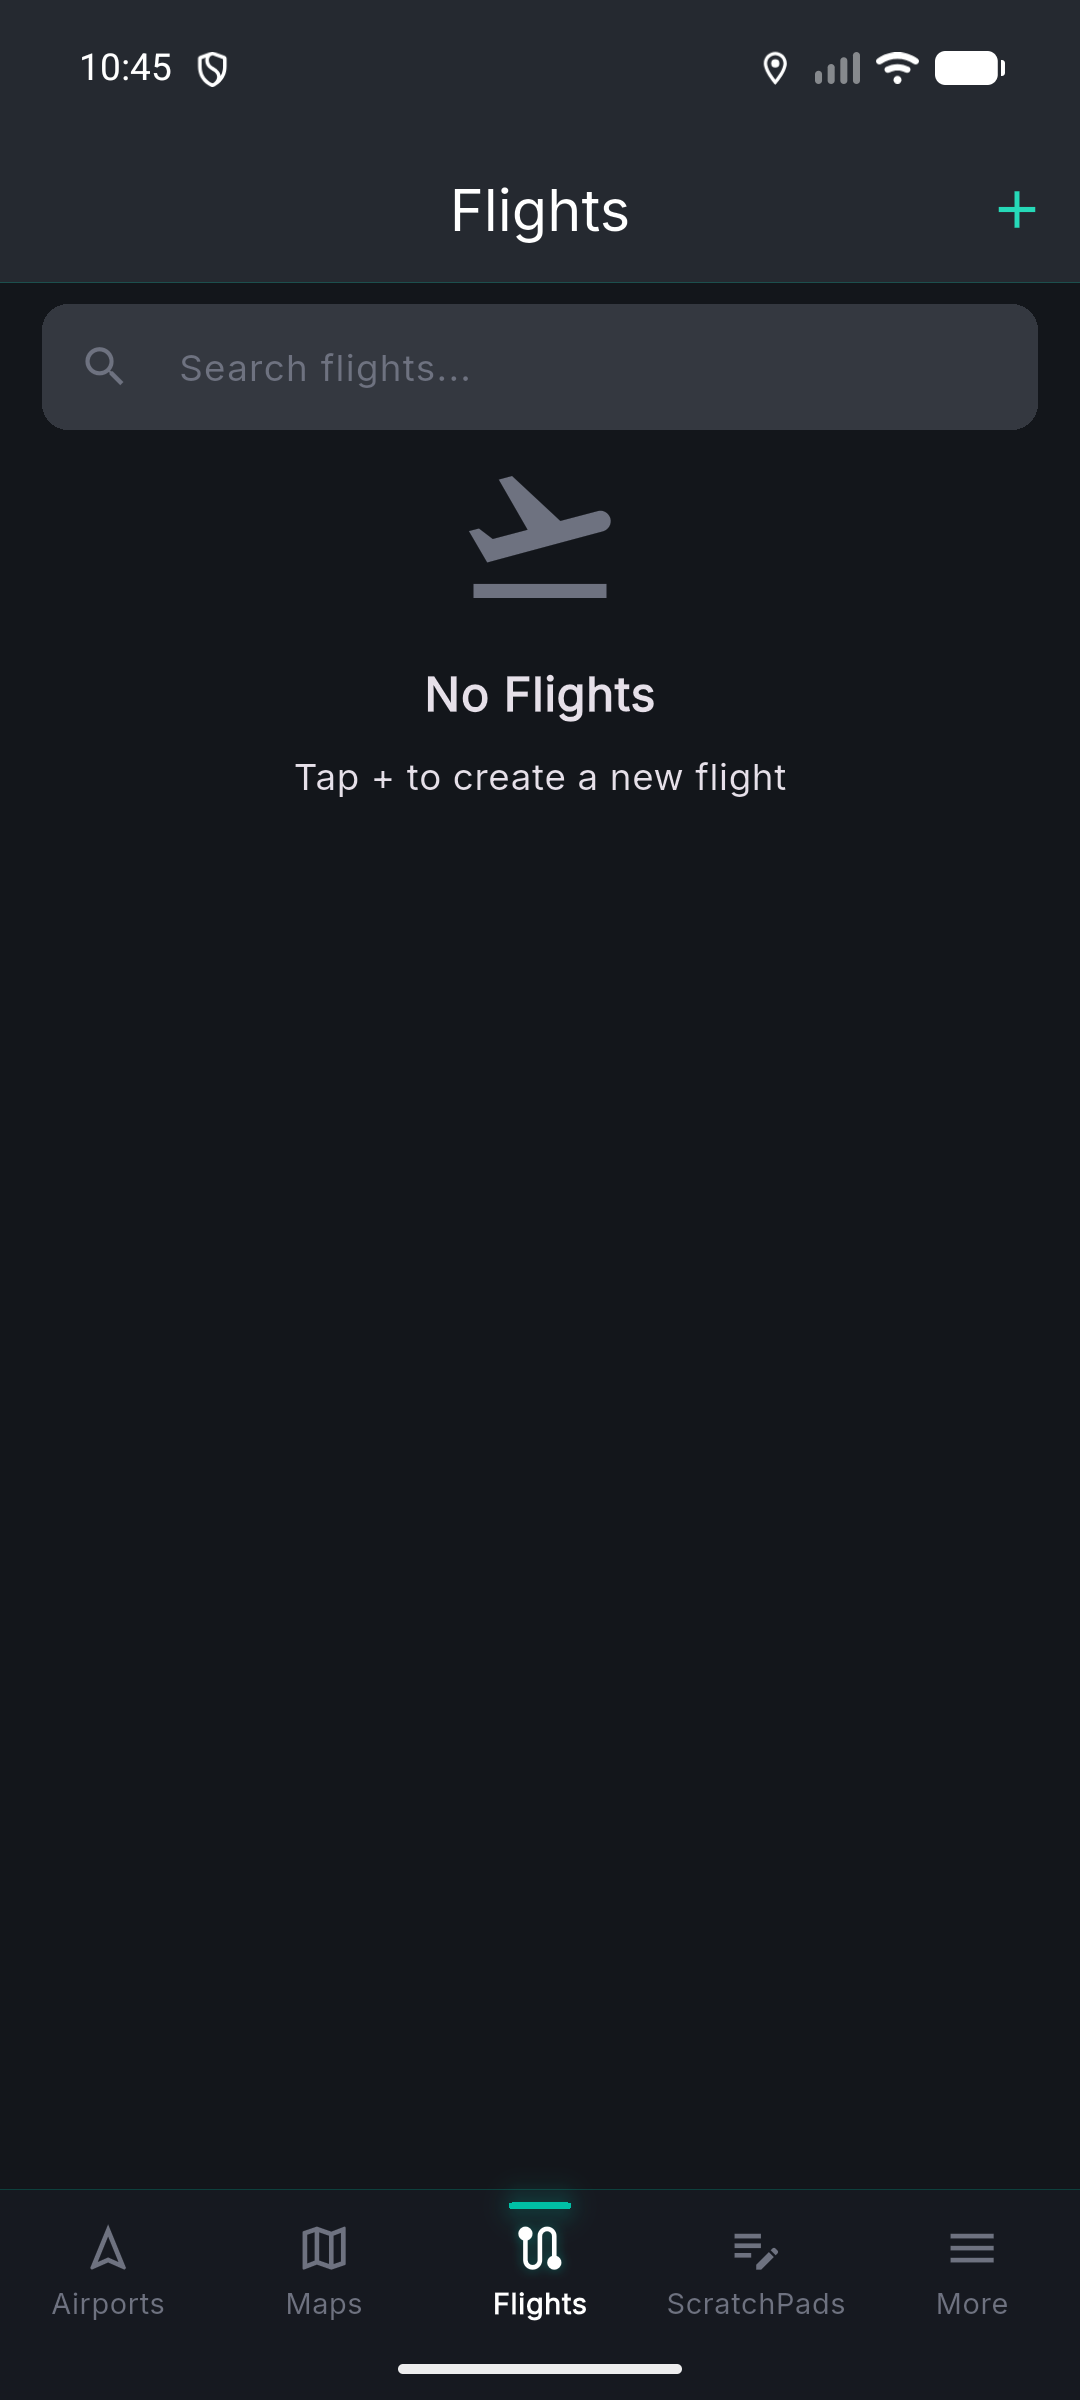
Create a new flight
- 1Open the Flights tab and tap the + button.
- 2The flight detail screen opens with your default aircraft and home base already filled in.
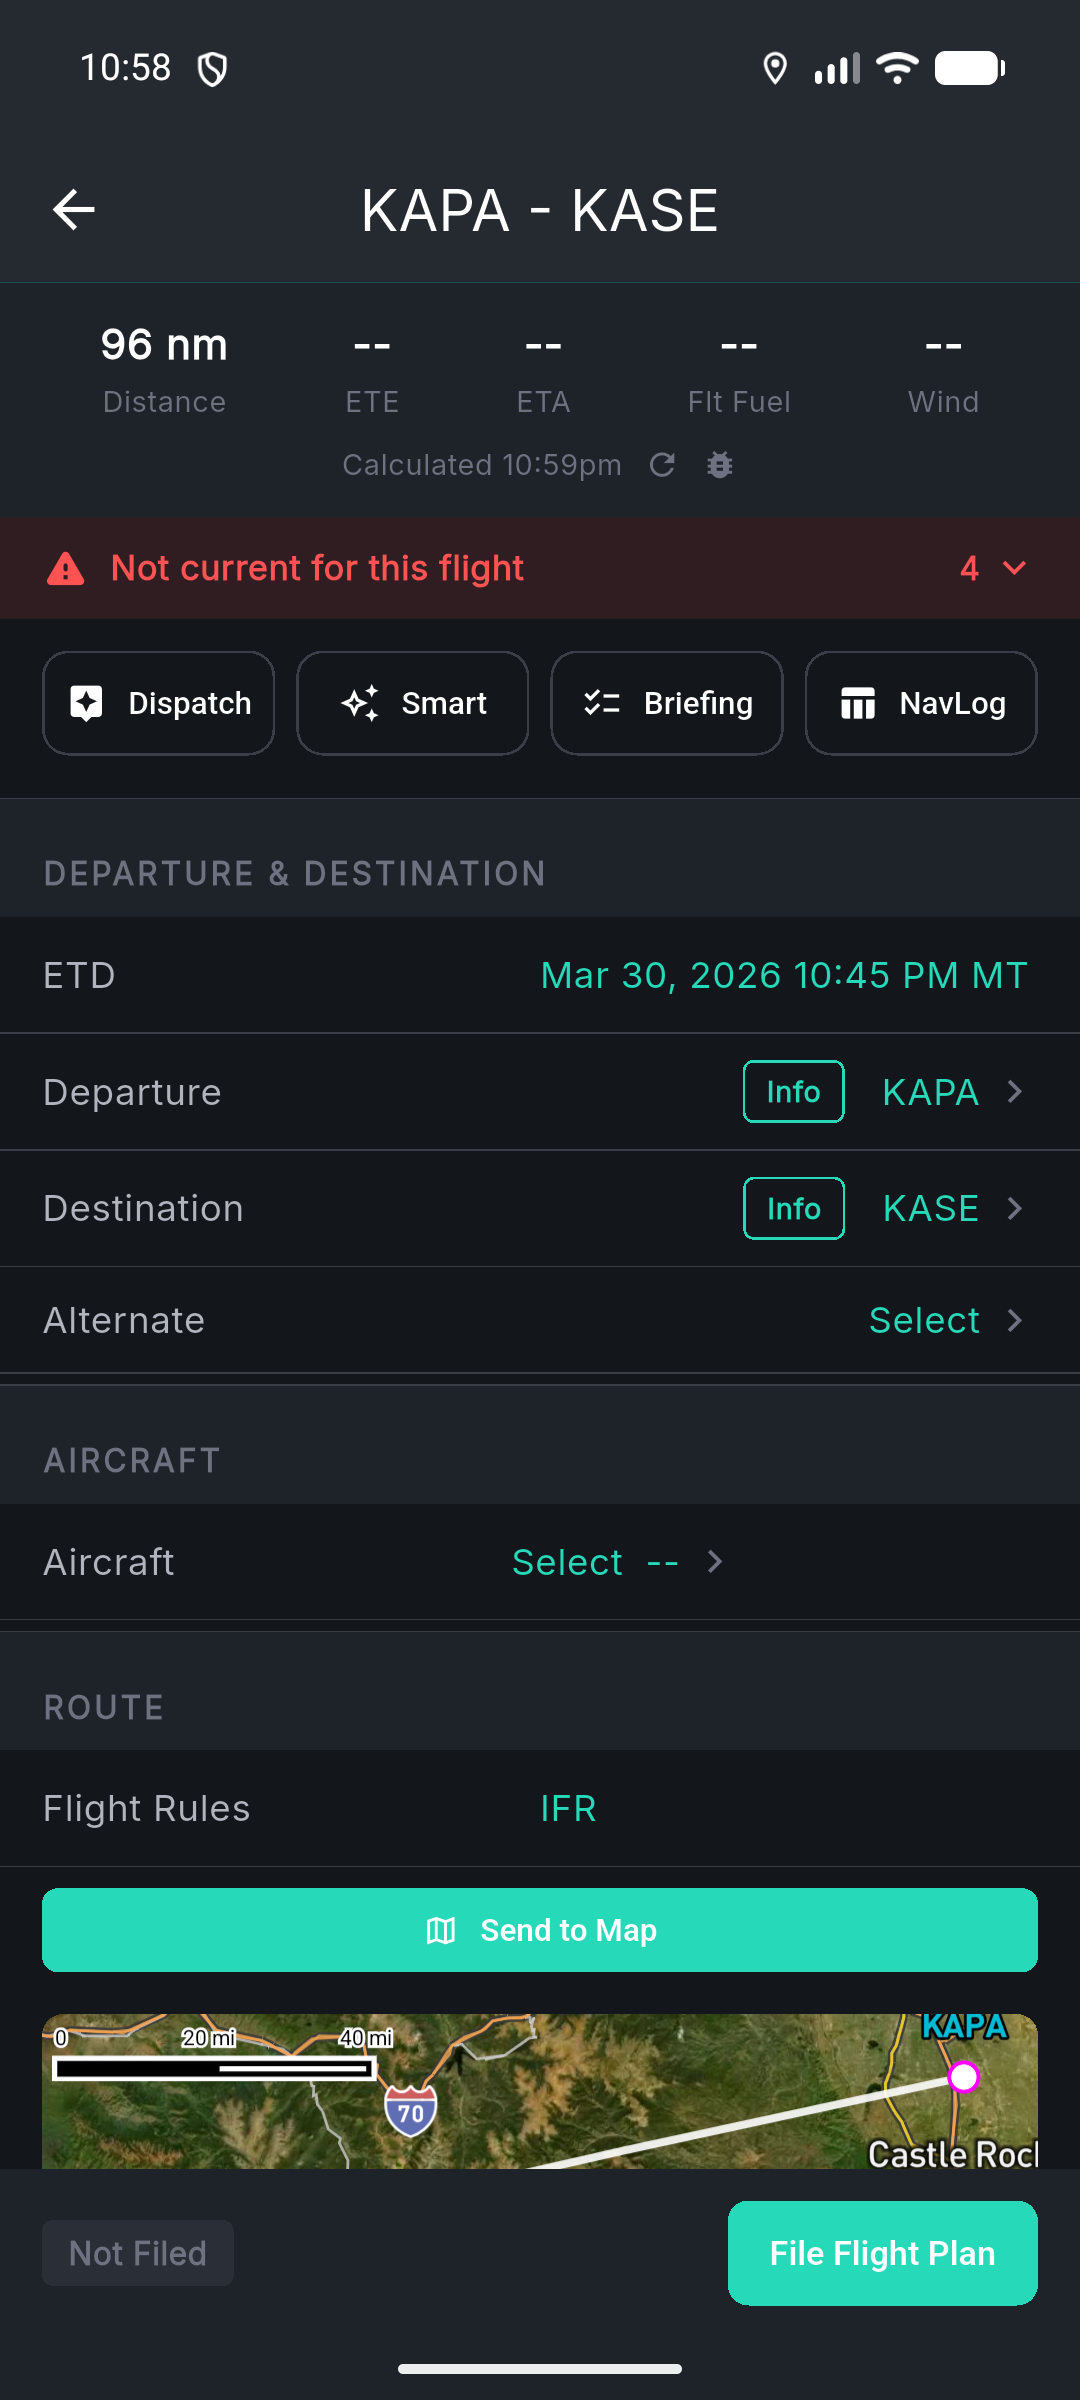
Set departure and destination
- 1Tap the departure airport field — your home base is pre-filled, but you can change it.
- 2Set your estimated time of departure (ETD).
- 3Choose your flight rules: VFR or IFR.
- 4Scroll to Route and enter your destination airport.
- 5Optionally add an alternate airport.

Build your route
- 1Enter a route string (e.g., direct, or VOR-to-VOR).
- 2Select SID, STAR, and approach procedures with transitions if filing IFR.
- 3Set your cruise altitude.
- 4Tropiq automatically calculates distance, estimated time en route, ETA, and wind components.
Pro tip: Not sure what route to fly? Use the Dispatcher (covered below) — it analyzes weather, airspace, and performance to recommend optimal routes and altitudes.
Configure payload and fuel
- 1In the Payload section, enter passenger count and average weight, plus any cargo.
- 2Set your fuel policy — starting fuel, reserve fuel, and fuel burn rate.
- 3Tropiq calculates your endurance and warns if fuel is tight for the planned route.
Flight detail — payload & fuel
Screenshot: Payload section with passenger, cargo, and fuel fields
Use the Dispatcher
- 1Tap the Dispatcher button on your flight to launch Tropiq's AI-powered flight analysis.
- 2The Dispatcher provides a narrative summary of your flight's feasibility, weather concerns, and hazards.
- 3It recommends optimal altitudes with analysis, scores route alternatives, and suggests alternates.
- 4Ask questions in natural language — "Is there ice along the route?" or "What's the best altitude for tailwinds?"
- 5Accept recommendations to apply them directly to your flight plan.
Pro tip: The Dispatcher is your copilot for decision-making. It gets smarter the more context your flight plan has — fill in aircraft, fuel, and route first.
Dispatcher analysis screen
Screenshot: Dispatcher with narrative summary, altitude recommendations, and Q&A section
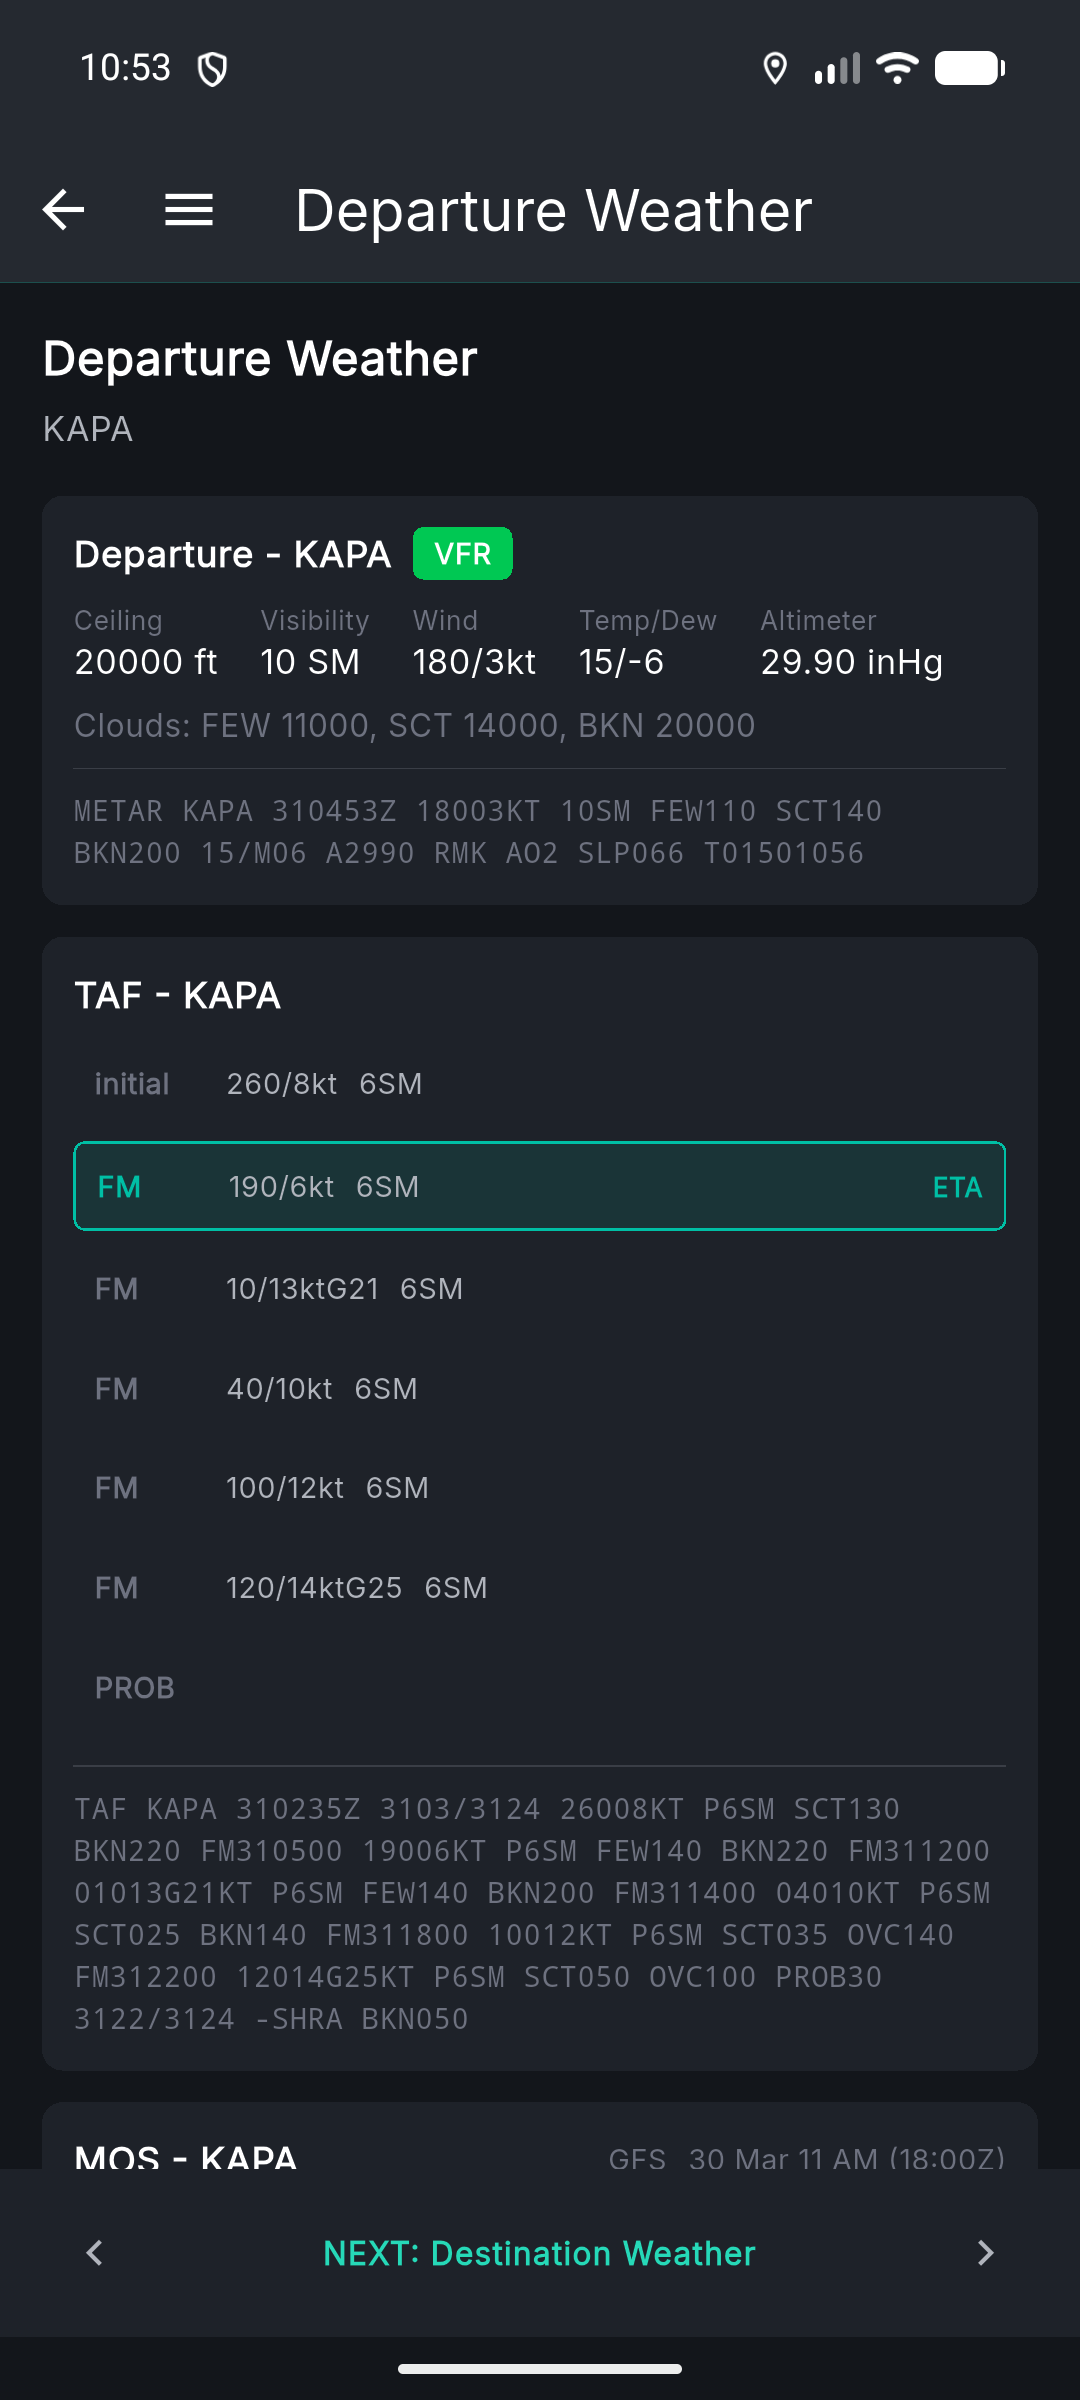
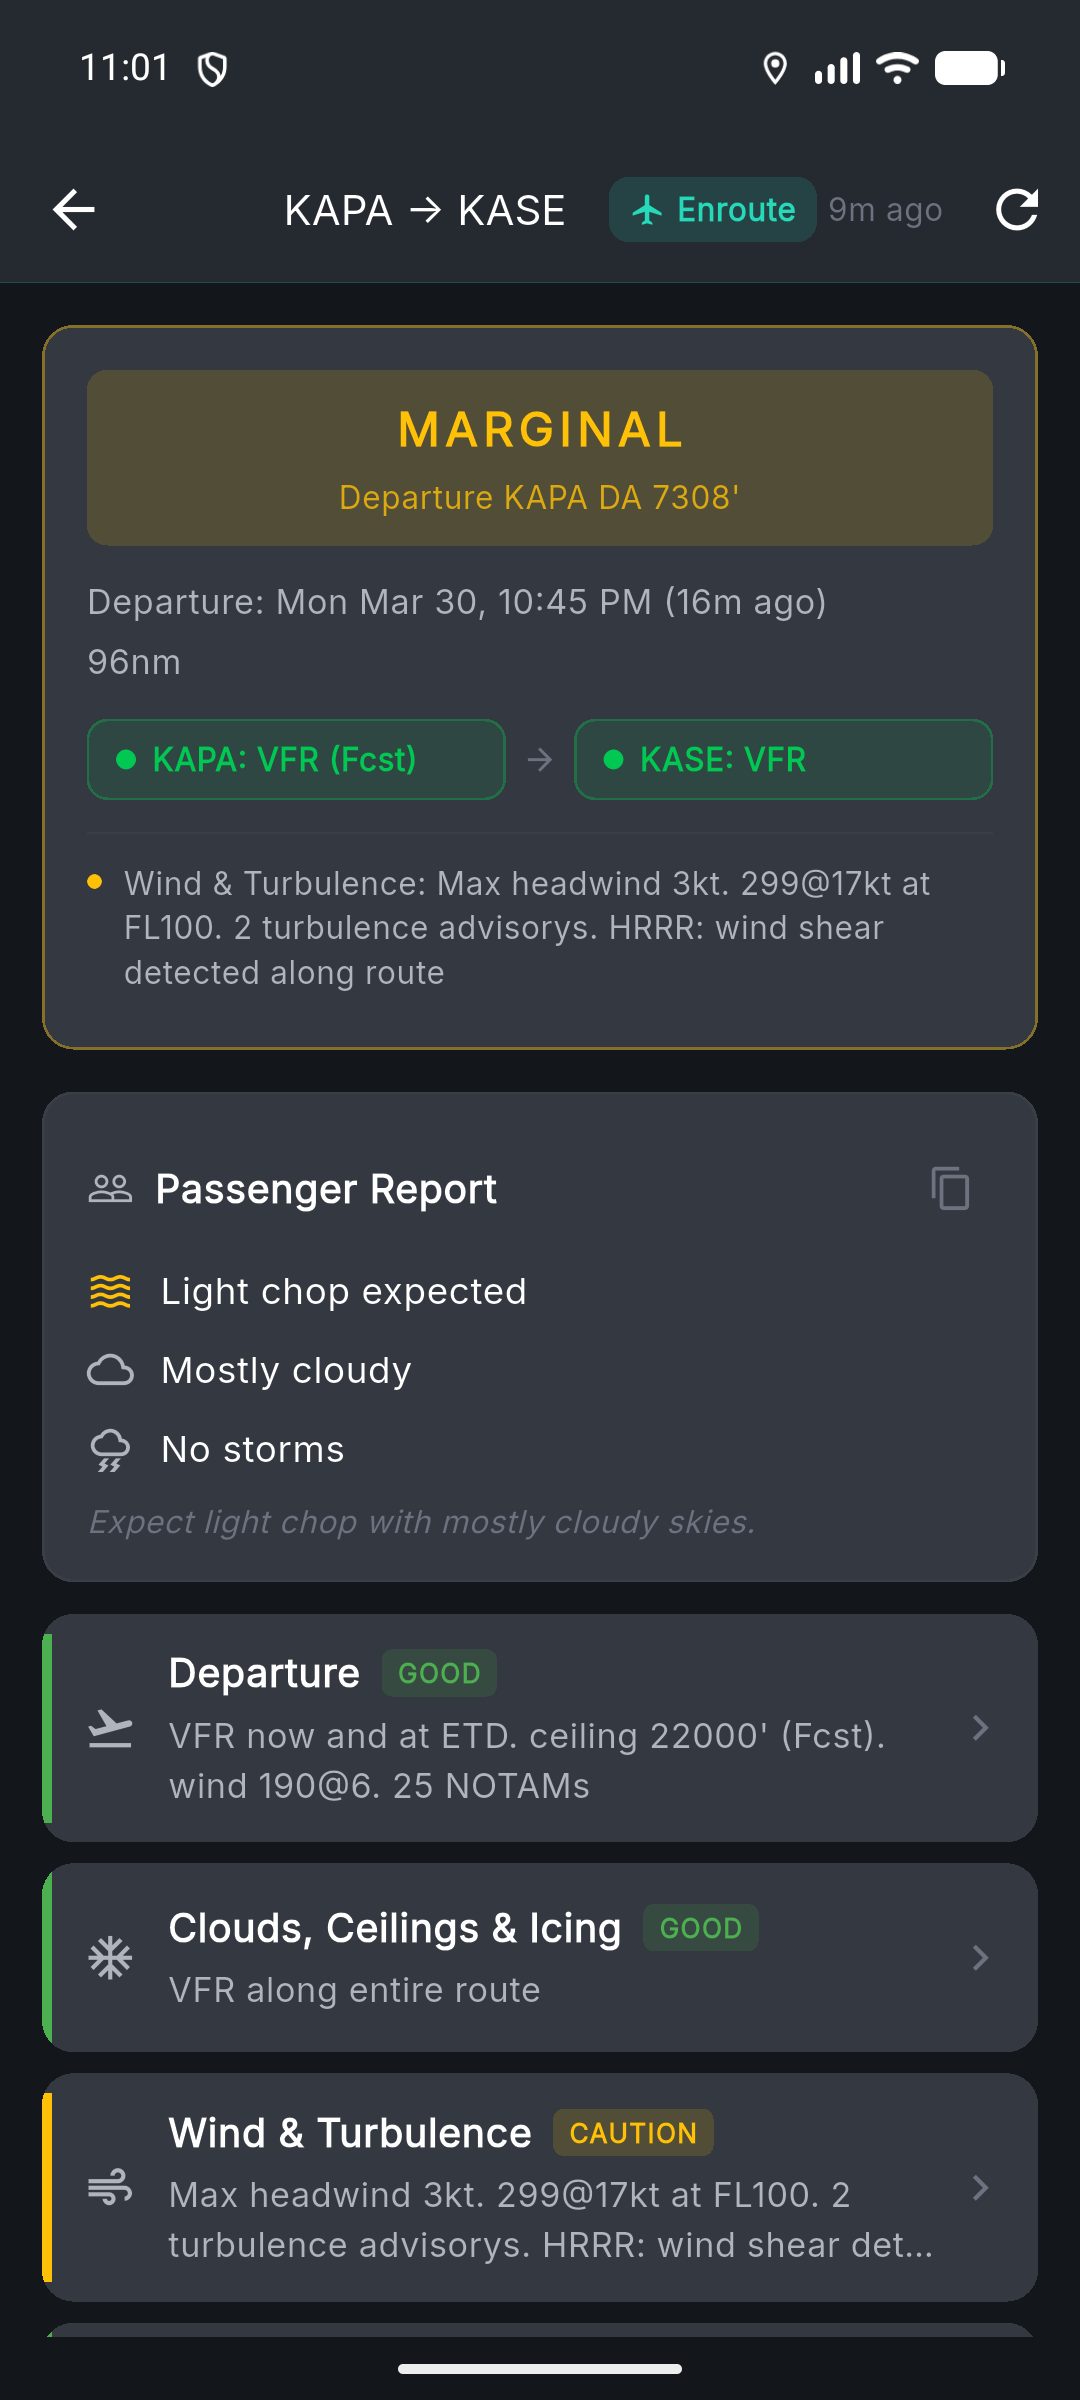
Get your briefing
- 1Tap Briefing on your flight to open the Smart Briefing.
- 2The briefing adapts based on how far out your departure is — focusing on trends days ahead, then shifting to specific conditions as departure approaches.
- 3Review weather, NOTAMs, TFRs, icing, turbulence, and winds aloft all organized by category.
- 4You can also pull a full Standard Briefing in traditional FAA format.
Check weight & balance and performance
- 1Tap Weight & Balance to see your CG plotted against the certified envelope for your aircraft.
- 2Stations are pre-loaded from your aircraft profile — just adjust passenger and cargo weights for this flight.
- 3Tap TOLD (Takeoff & Landing Data) to see runway performance data for your departure and destination.
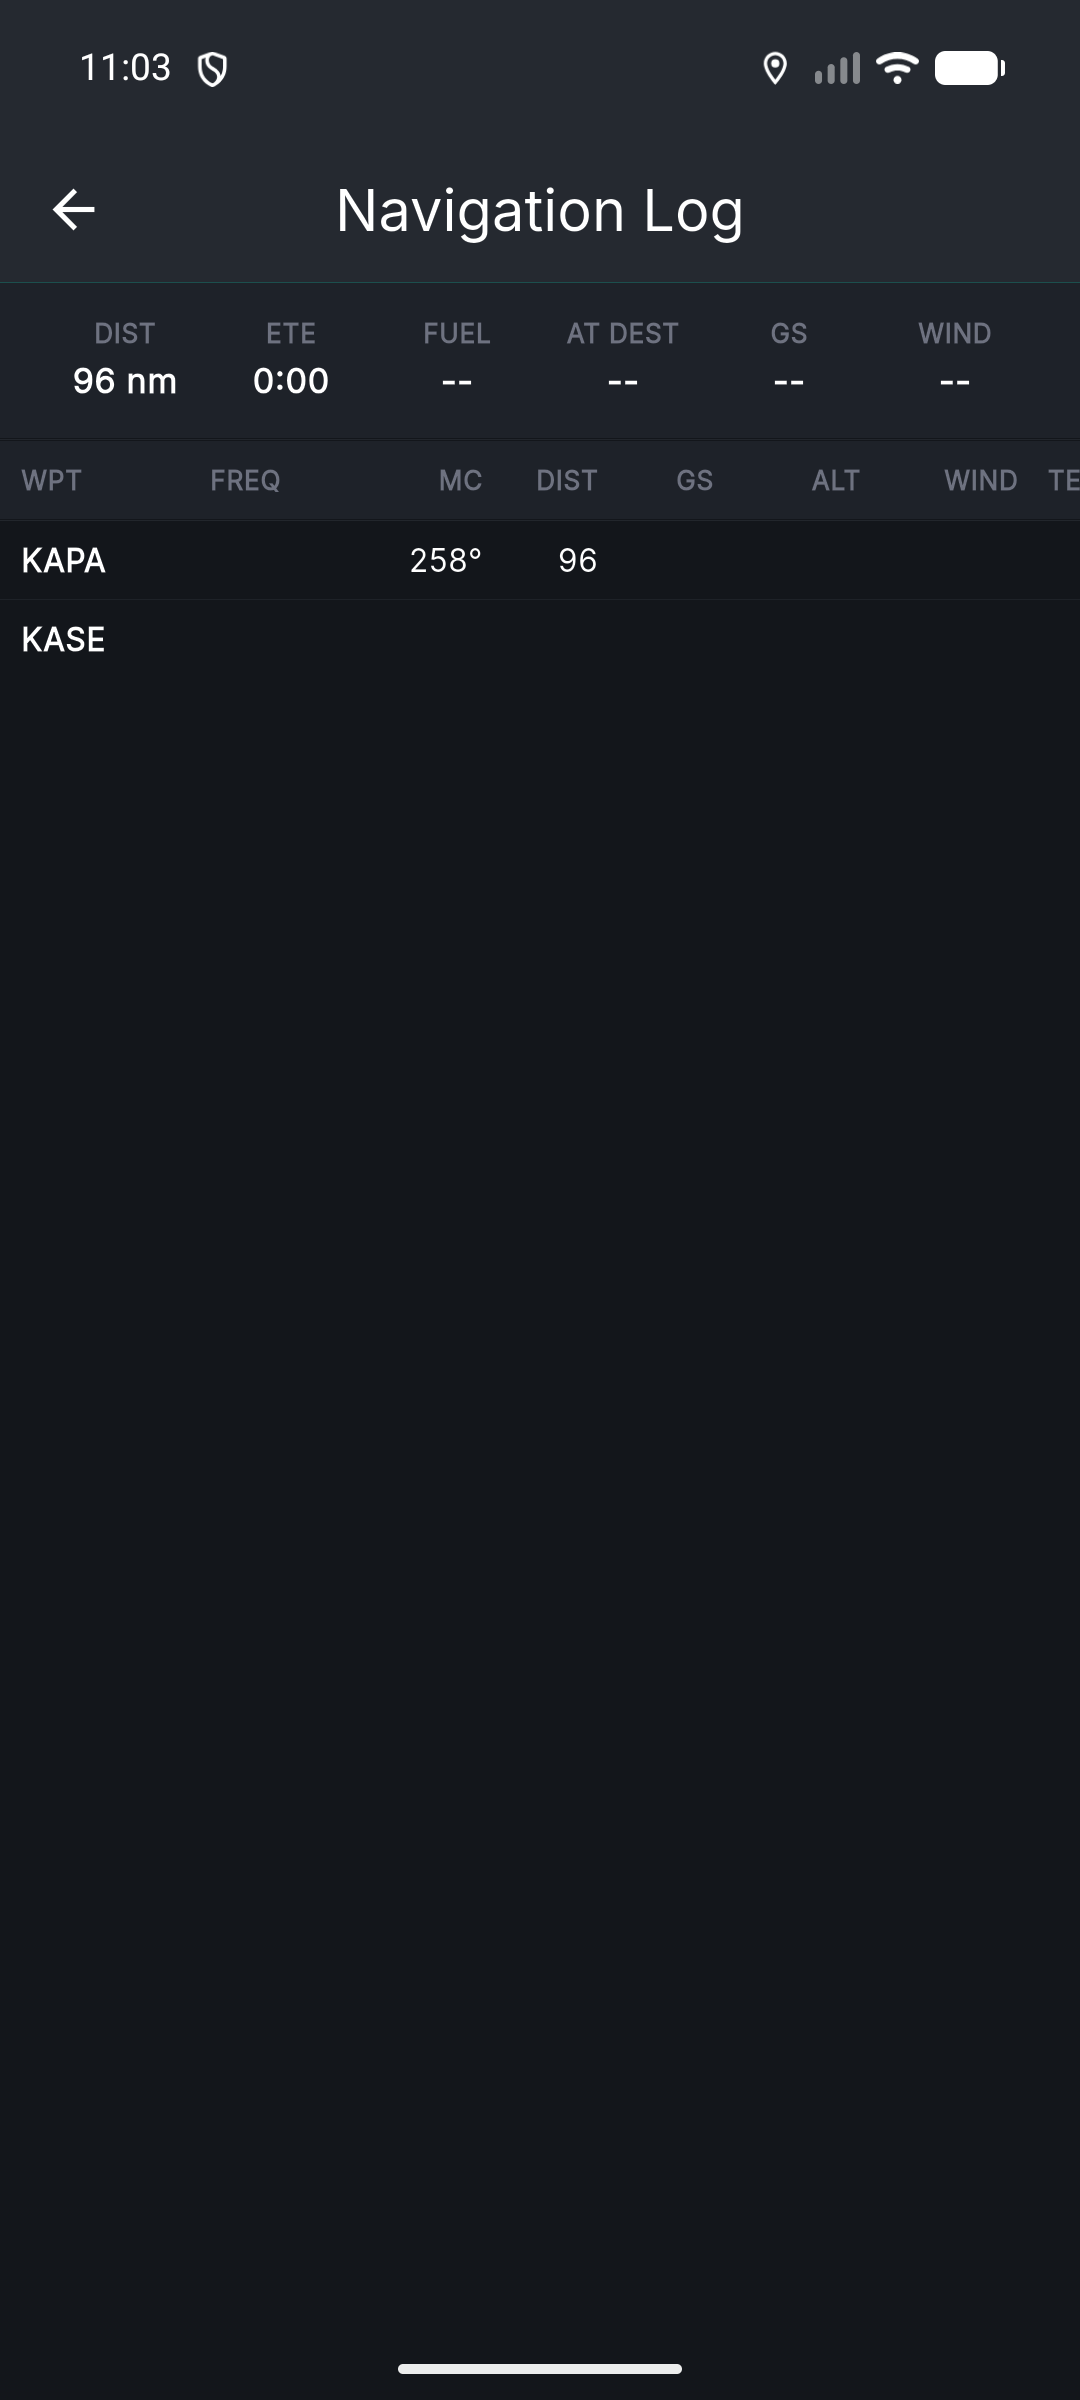
- 4Review the NavLog for a full navigation log with waypoints, headings, fuel burns, and ETEs.
File and fly
- 1When you're ready, tap File Flight to submit your flight plan to FSS.
- 2Track your filing status (pending, filed, closed) right from the flight detail screen.
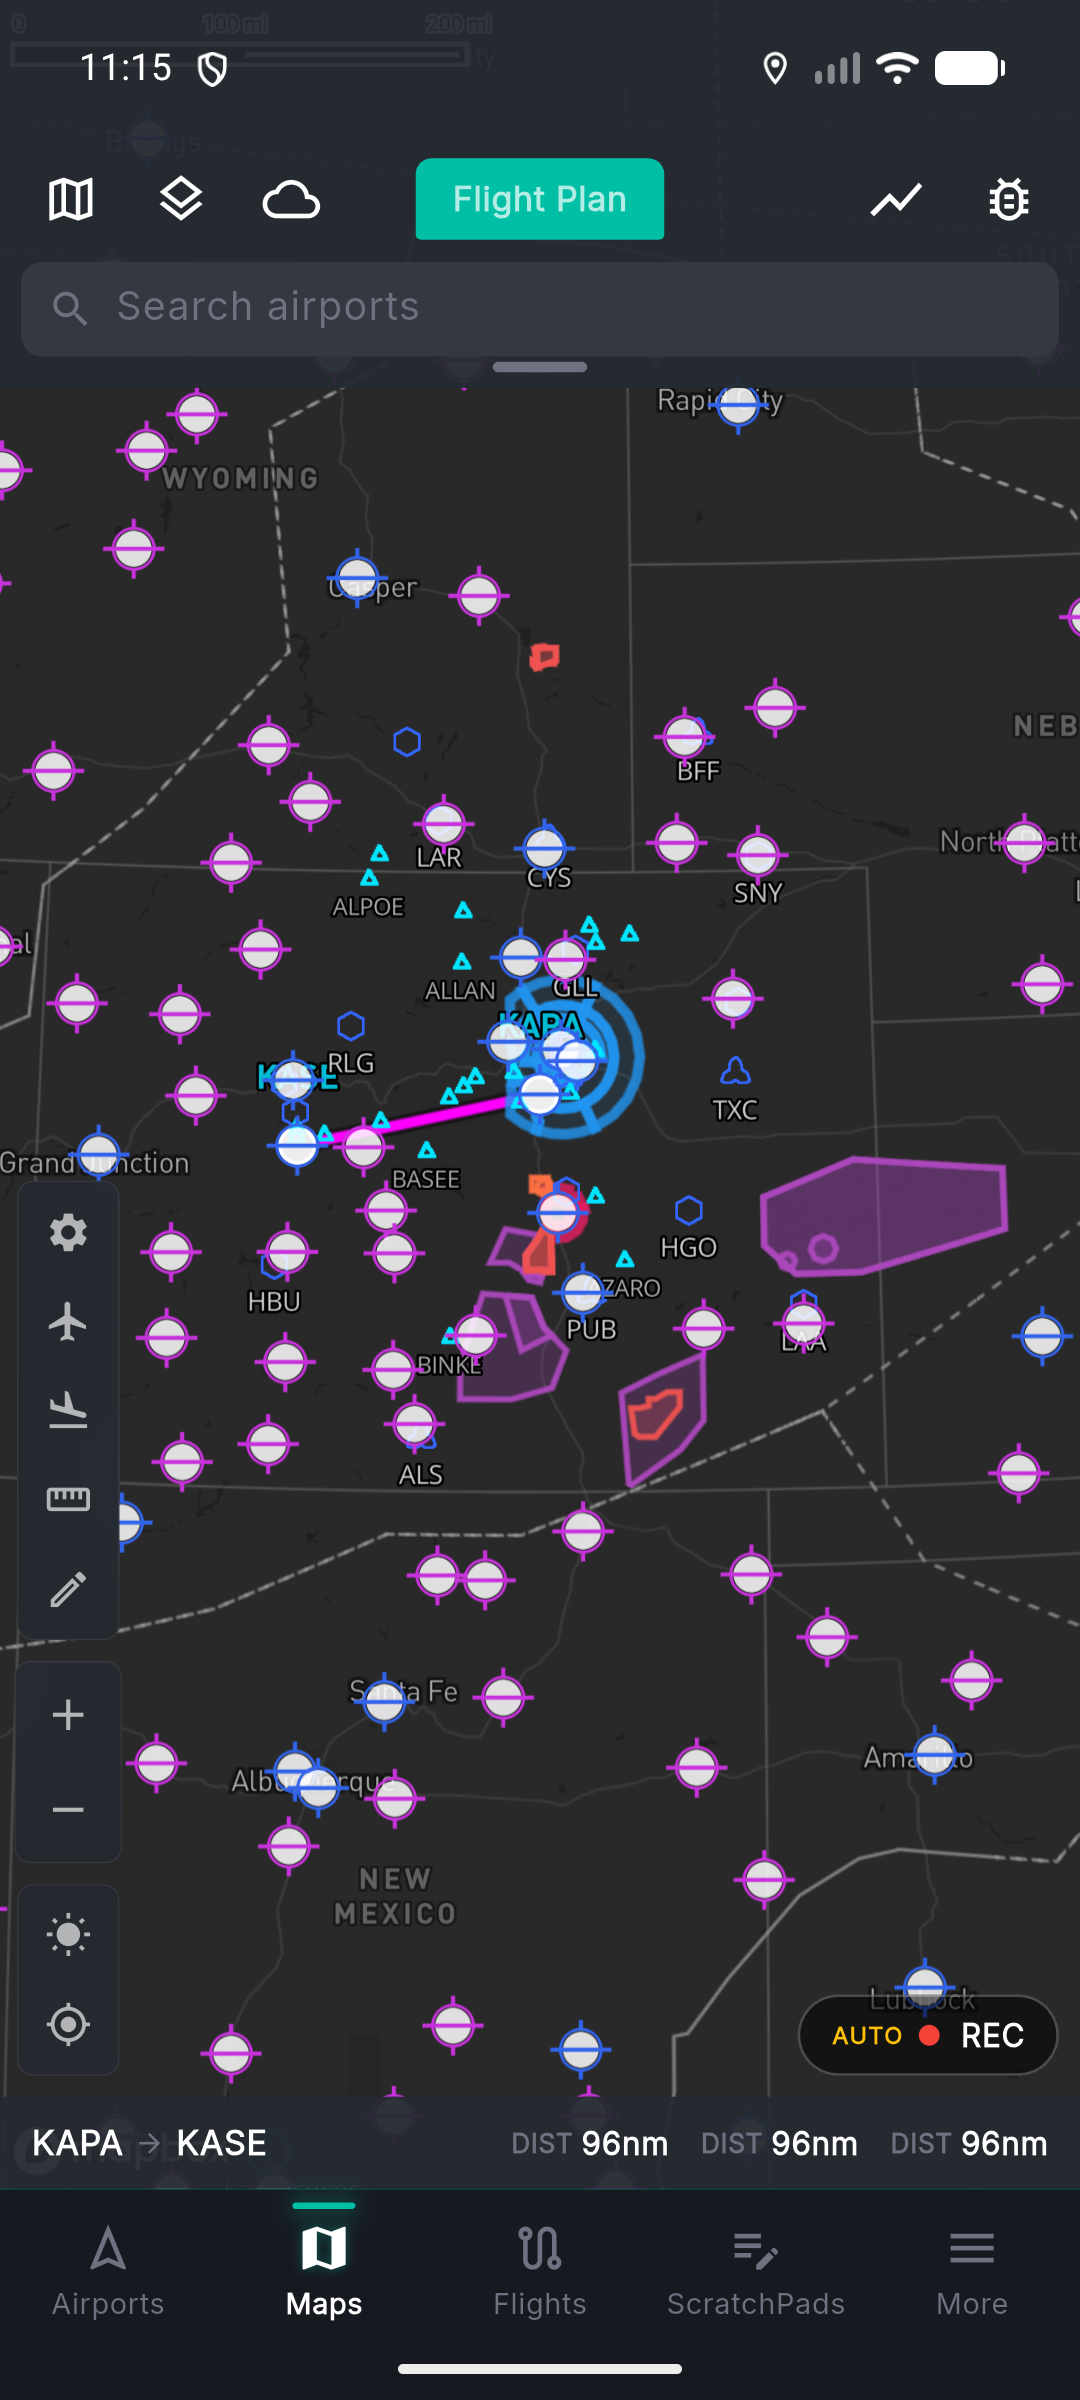
- 3Head to the Map tab to see your route plotted with live weather, traffic, and airspace overlays.
Or use the Trip Wizard
Prefer a guided experience? The Dispatch Trip Wizard walks you through flight creation conversationally — just answer a few questions and Tropiq builds the plan.
Launch the Trip Wizard
- 1Open the Dispatch tab (under More if it's not in your bottom bar).
- 2The wizard asks you a series of simple questions: Where are you going? Which aircraft? When do you want to depart?
- 3Pick your destination by searching a city name or airport identifier.
- 4Select your aircraft from your fleet.
- 5Choose a departure date and timing preference — flexible, morning, afternoon, evening, or a specific time.
- 6Review the summary and tap Create. Tropiq builds the full flight plan for you.
Pro tip: The Trip Wizard is great for quick trip setup. For more control, create flights directly from the Flights tab.
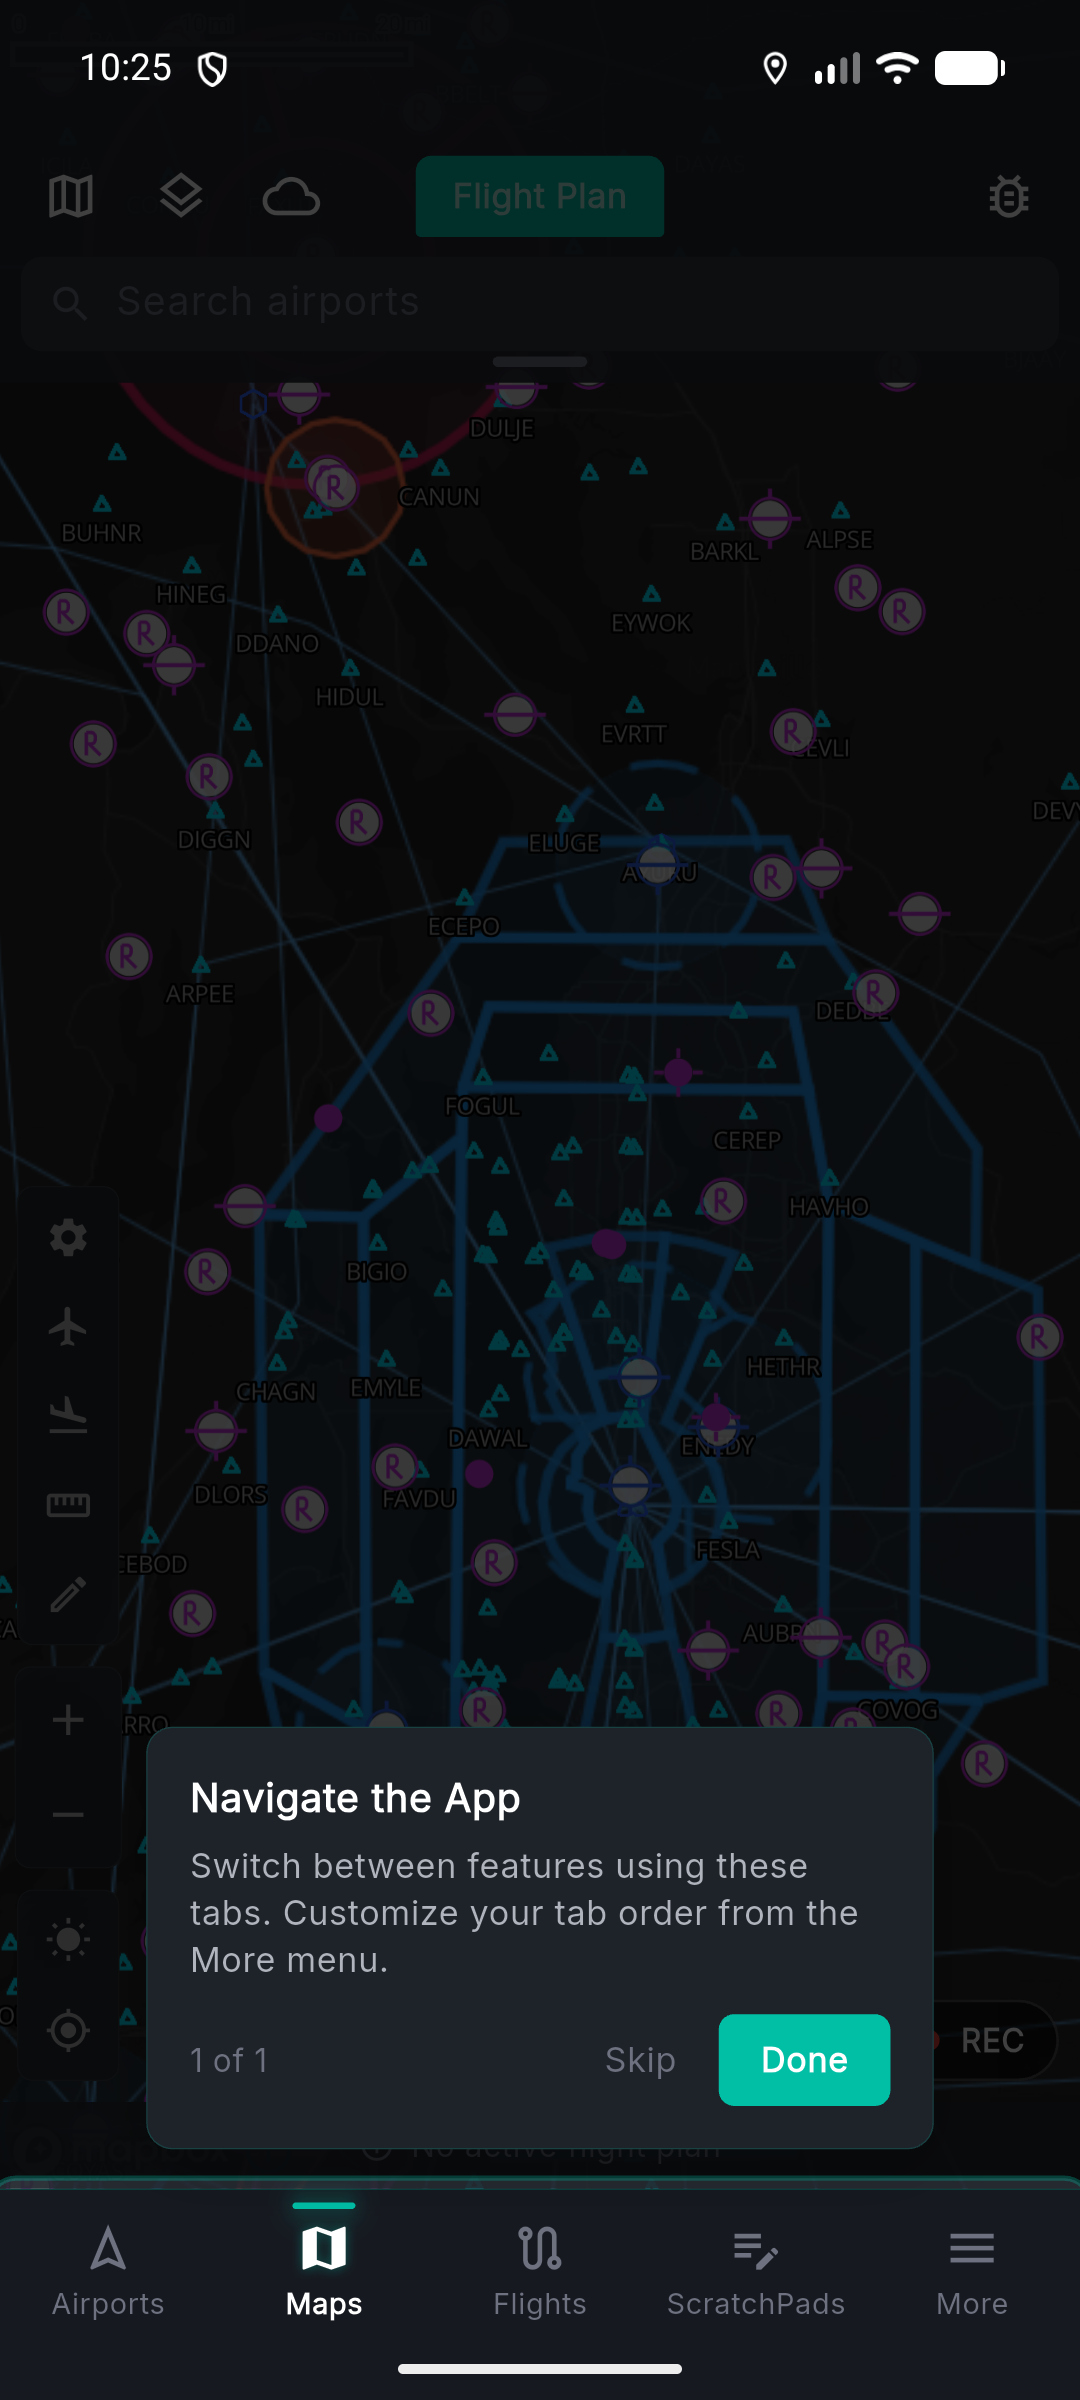
Navigate the App
Tropiq puts everything a pilot needs behind a customizable tab bar. Here's how the app is organized and how to make it yours.
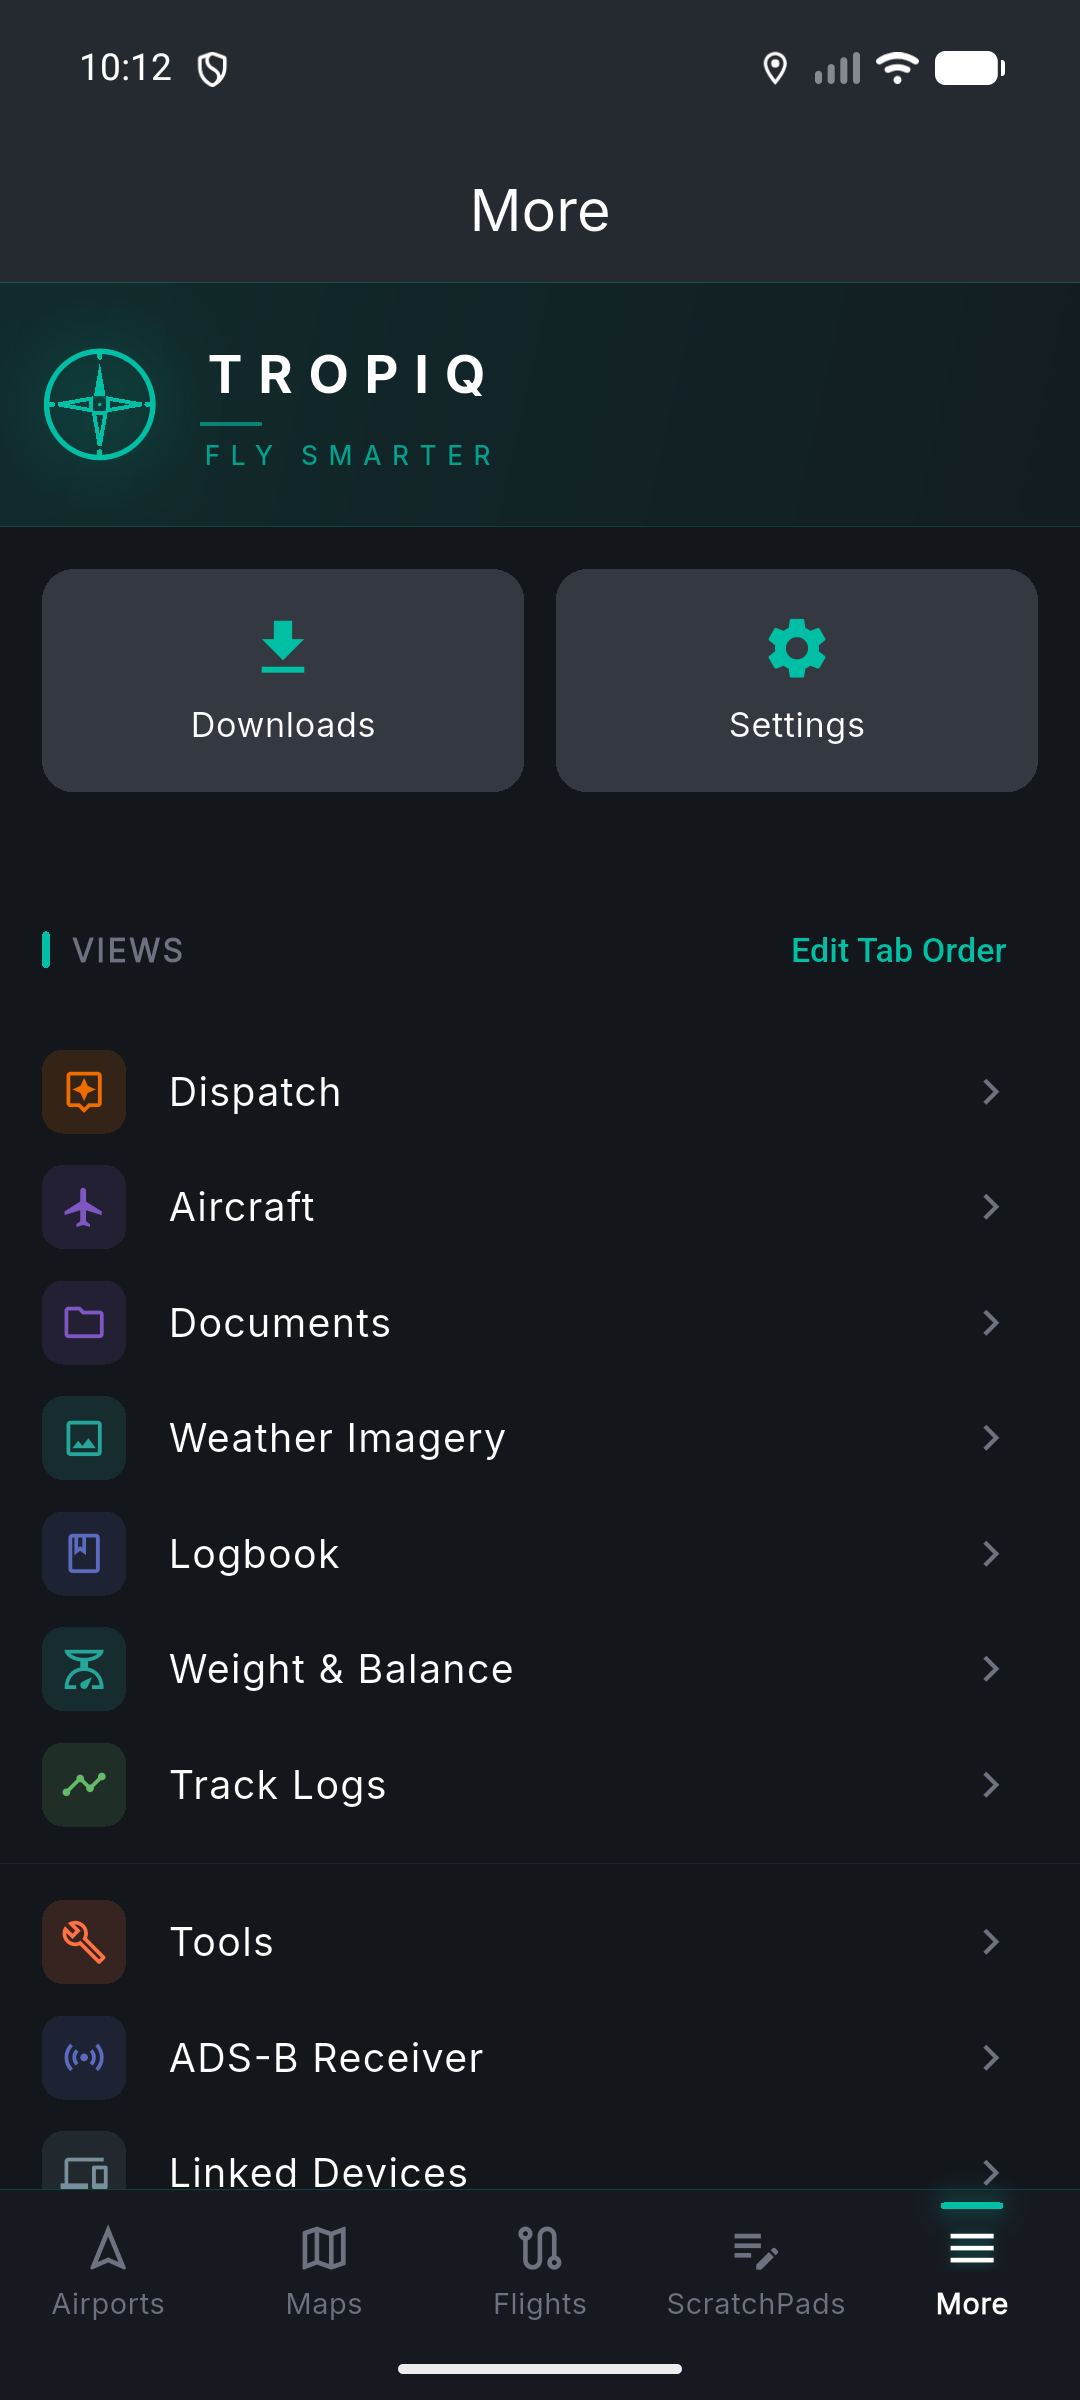
The bottom tab bar
- 1Your bottom bar shows 4 tabs by default (more on iPad). These are the screens you use most often.
- 2Tap More to see every tab in the app, plus your profile, settings, and tools.
- 3To customize which tabs show in your bottom bar, go to More, then tap Edit Tabs. Drag tabs to reorder or swap them out.
Pro tip: Most pilots keep Airports, Maps, Flights, and Logbook as their four tabs — but customize to your workflow. A student might want ScratchPads; a CFI might want the CFI tab.
Your tabs at a glance
Airports
Search 20,000+ US airports. View METAR, TAF, NOTAMs, procedures, runway info, FBOs, and fuel prices.
Maps
Interactive moving map with VFR/IFR charts, weather overlays, traffic, airspace, and NOTAMs.
Flights
Create, edit, and manage flight plans. Access briefings, dispatcher, W&B, and filing.
Logbook
Digital logbook with currency tracking, endorsements, certificates, and pilot reports.
Aircraft
Manage your fleet — performance profiles, fuel tanks, W&B, maintenance, and documents.
Weather Imagery
Radar, satellite, prog charts, SIGMETs, AIRMETs, PIREPs, icing, turbulence, and winds aloft.
Dispatch
Trip Wizard for guided flight creation. AI-powered route and altitude analysis.
Documents
Upload and organize POH, AFM, registration, insurance, and other aircraft documents.
Weight & Balance
Standalone W&B calculator with visual CG envelope for any aircraft in your fleet.
ScratchPads
Quick notes, clearances, ATIS, and checklists. Your digital kneeboard.
Track Logs
Auto-recorded flight tracks with GPS. Review routes, times, and distances after every flight.
CFI
Instructor tools — manage students, sign endorsements, and review student logbooks.
The Map — your inflight companion
- 1The Map tab is your primary inflight screen. Your position (own-ship) appears as a configurable icon.
- 2Tap the layer picker to toggle weather products on and off — radar, METARs, winds, TFRs, and more.
- 3Long-press anywhere on the map to drop a waypoint pin.
- 4If you have an ADS-B receiver (Stratux, SkyEcho, or GDL 90), traffic appears automatically with bearing and altitude readouts.
- 5Your filed route is plotted on the map with active weather along the way.
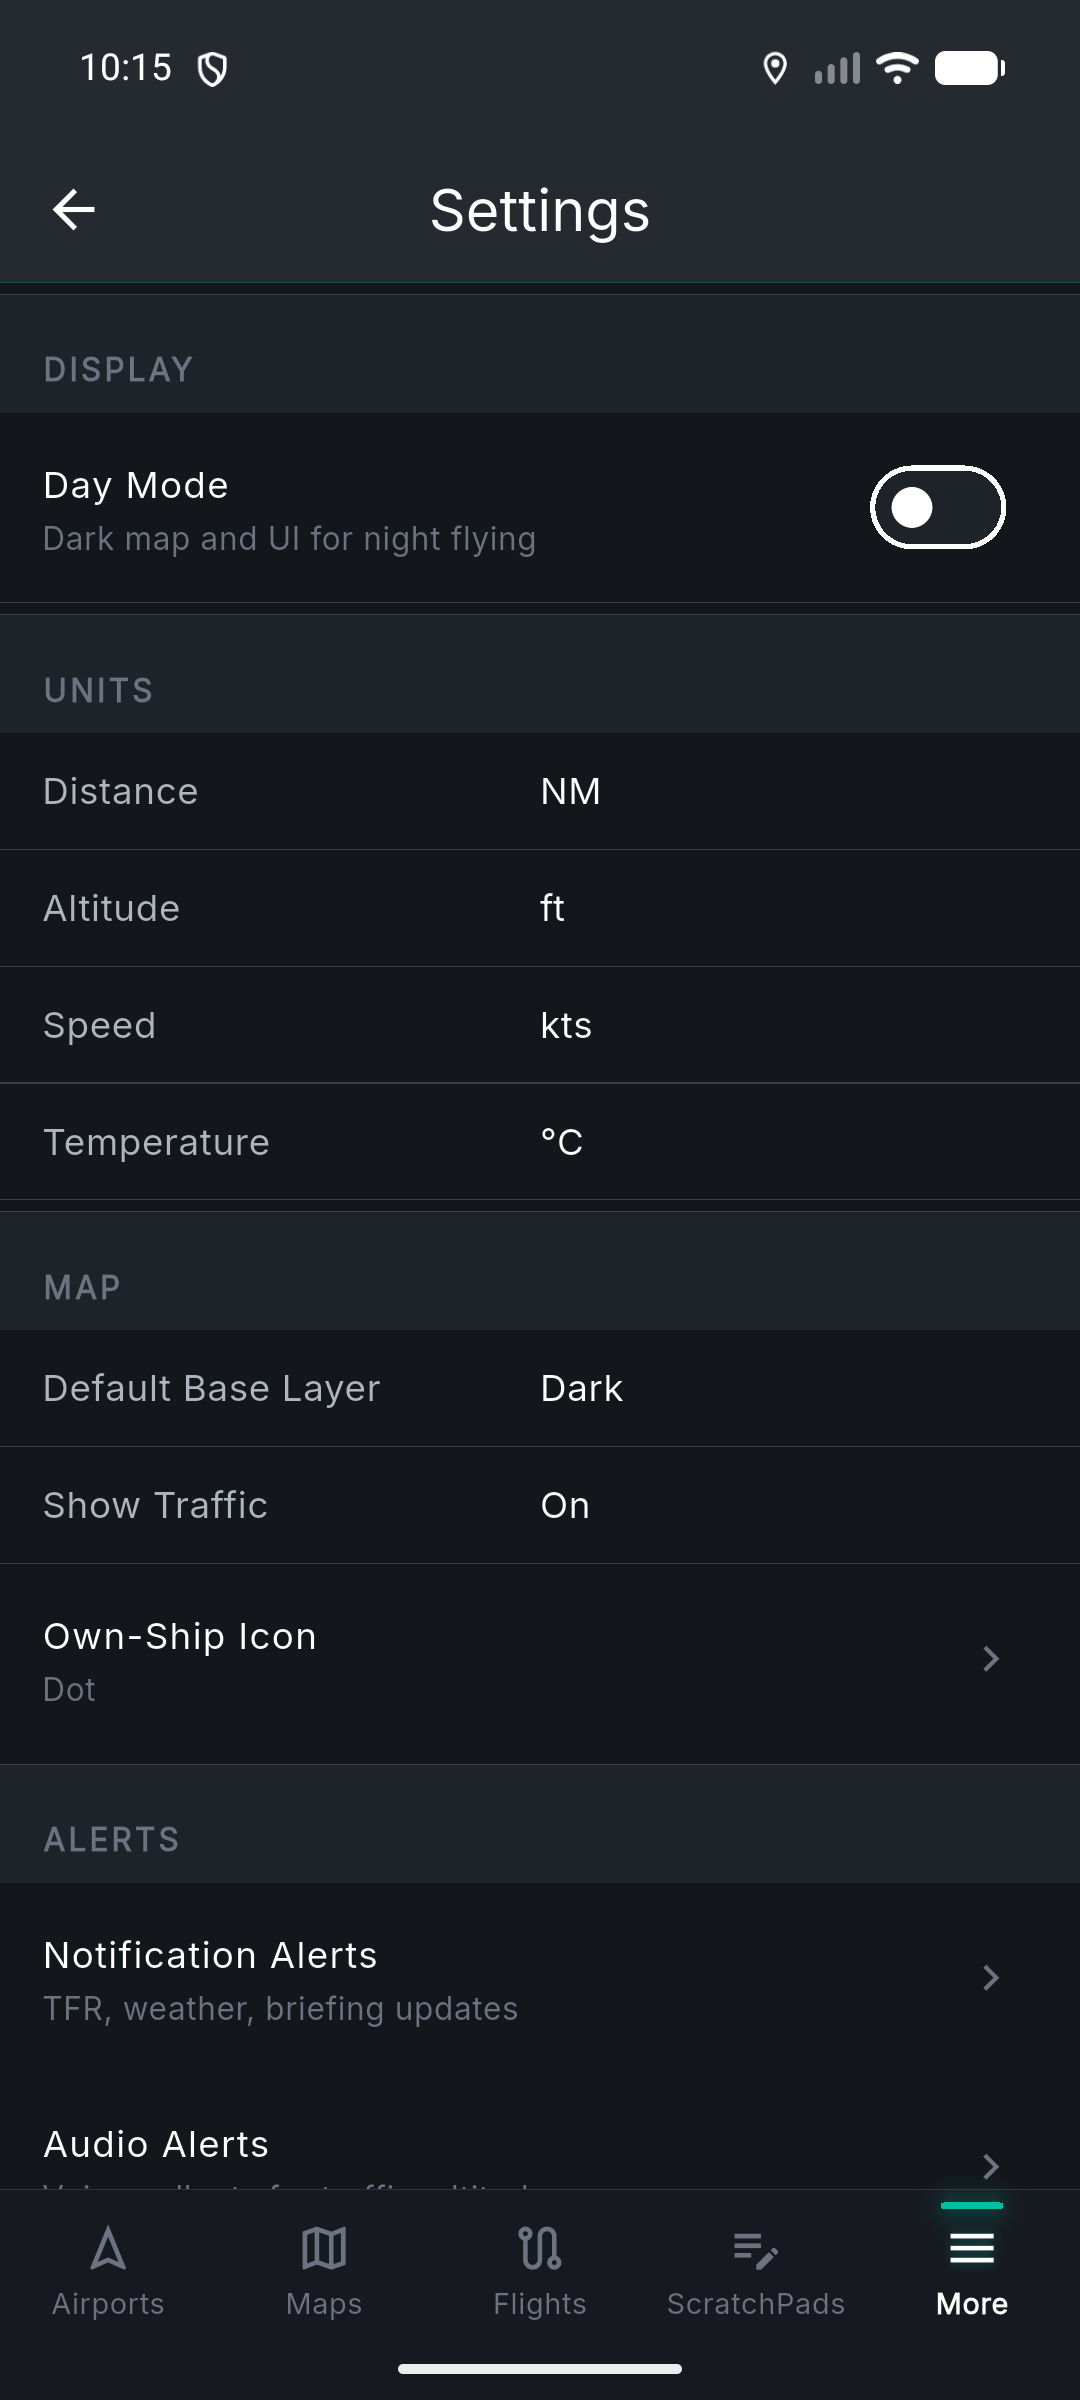
Settings and personalization
- 1Open More and tap Settings.
- 2Switch between Day and Night display modes.
- 3Choose your own-ship icon style — options include a simple dot, Cessna, F-16, and more.
- 4Configure map display options, notification preferences, and manage offline data downloads.
- 5Under Downloads, grab chart data for offline use before you fly to areas with poor connectivity.
Pro tip: Download sectional and IFR charts for your region before any cross-country. Tropiq works fully offline once the data is cached.
Ready to fly with Tropiq?
Download the app and be flight-ready in under ten minutes.